Updated September 8, 2025
Each year, I buy pumpkins and gourds in the middle of September and they last (outside in sunny San Diego!) until Halloween and after.
It’s true!
Prepping your pumpkins and gourds makes all the difference.
It takes just a few minutes and doesn’t cost much at all.
Let’s see how it works.
Pumpkin Supplies
Here’s the easy part.
You just need:
- Pumpkins
- Bleach (Alternative option: Vinegar, but at a 1/10 ratio with water)
- Clear Enamel Spray

Pumpkin Steps
Also easy….
- Fill your kitchen sink with cold water and add 1/4 cup of bleach. (Vinegar works too.)
- Remove stickers/price tags from your pumpkins and soak them in the water/bleach solution.
- Use your hands or a sponge to gently scrape off any dirt or build up from being in the pumpkin patch.
- Set pumpkins out to dry.
- Spray with Clear Enamel Spray Paint.

Pumpkins Video
Check out the entire process here.
Pumpkin Carving Tips
- Cut the pumpkin from the bottom instead of the top
- Use a handheld mixer to help detach the goopy stuff inside
- Use cookie cutters and a rubber mallet to make shapes
- A red dry erase marker works best for drawing your design on the pumpkin – it can be wiped off!
- Line the raw, cut edges of your pumpkin with Vaseline to help prevent rotting
- Sprinkle the inside of your pumpkin with cinnamon for a nice fragrance while it’s burning
Pumpkin Notes
- Removing dirt and any lingering growth from the patch and then sealing the pumpkin prevents rotting.
- You can buy a high gloss spray if you want your pumpkins shiny. I usually use a matte finish.
- Be sure to spray the bottom of your pumpkins. This will prevent rotting in case moisture from the ground seeps in.
- When placing pumpkins on mulch, grass or anything that could bring in moisture, slide a piece of foil or other material that will create a little barrier for added protection. The sprays are good, but constant moisture will cause a problem.
I prep my pumpkins each year like this in the middle of September. Then, we carve 3 of them the night before Halloween. The rest hang out until Thanksgiving.


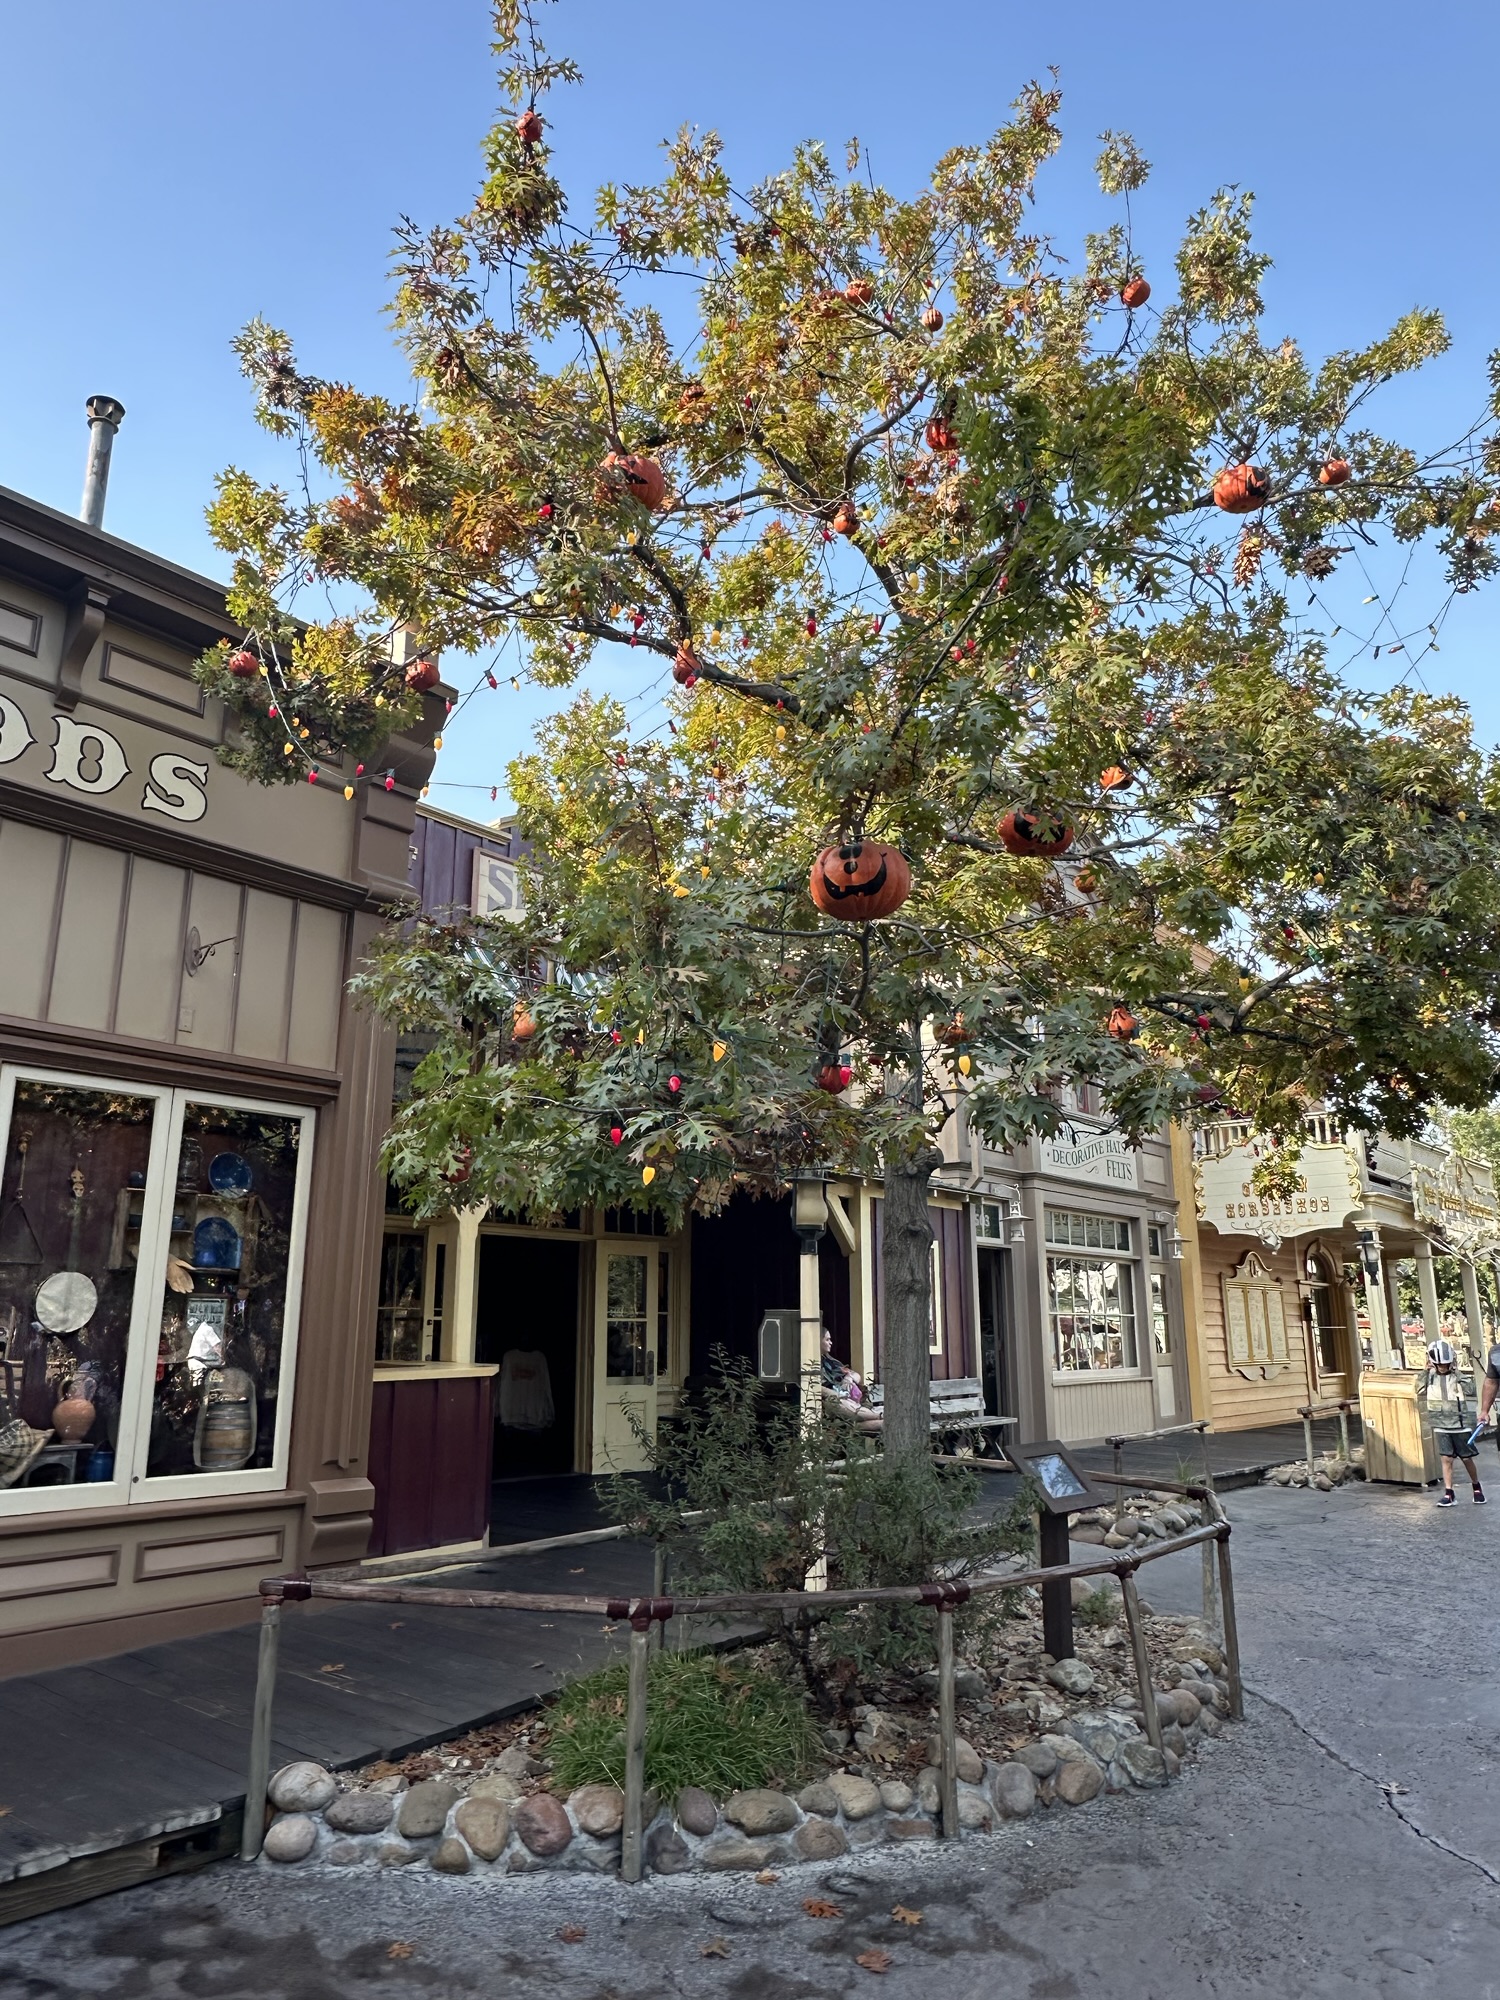
The Pumpkin Tree
Each year, my husband recreates a very simplistic version of the Halloween Tree found inside Disneyland Park in Frontierland.
The Halloween Tree holds 3 strands of these lights, but they only light about a dozen pumpkins.
Supplies:
- 12 plastic pumpkins
- 3 strands of lights
- Twine or zip ties
Here’s how to do it:
- Stretch out the (25 feet x 3 strands =) 75 feet to encompass most of the bottom of your tree.
- Cut an X in the bottom of each pumpkin and then feed the light socket through.
- Connect your pumpkins, as you wish, to the lights with twine or zip ties.
- Remove the bulbs from the stands that are not lighting pumpkins.
This link shows what the tree looks like. (Look for a cameo from our kitty in the tree.)

The Mini Halloween Tree
Want to make a mini tree? Here’s a link to an option I used for a 4 foot Jade bush that I shaped into a mini version of the famous tree in Frontierland at Disneyland.
Here’s a video of the mini tree.

Notes
- I used to shop for pumpkins at Sprouts or Trader Joe’s. They tend to have the best options. Unless you have Winco! They have pumpkins for $.33/pound. I got 3 huge pumpkins this year (2025) for $13.66. They’re gorgeous! Winco is my favorite.
- As mentioned above, you can use vinegar instead of bleach. When I originally posted about using bleach, I learned very quickly that people have STRONG feelings about this and prefer vinegar, as it won’t harm wild animals. I tried it in 2023 and it was not as effective. Trying it again in 2024. Stay tuned!

| Take a look at how Get Away Today can help with your vacation |
 |